How to Draw Animal Skulls… Better
Charcoal and white chalk drawing of a Leopard skull. © Christine Mercer-Vernon.
“If you want to be more confident in your skull drawings (and paintings) then you need to do the work up front to better understand your subject.”
Trust me when I say, I’ve been there… you’re excited because you found an animal skull in the woods, brought it home and tried to draw it. But no matter what you did, it was a struggle to get the proportions right, and you wound up frustrated.
While there are no short cuts, or tricks to get there faster, you can make progress in your ability to render skulls by taking a step back and doing a little upfront work to get to know your subjects better.
Animal skulls have a lot going on but if you spend some time studying them through drawing you will improve your decision making once you begin a more finished artwork.
Sure, it’s a lot more work, but it’s worth it. I’ve spent a lot of time drawing the parts of every skull I struggled with. Teeth especially.
Here are three ways I use to improve my skull art:
Look your skull over, study all the intricacies, then do it again.
I know this is stating the obvious, but if you look it over, put it out of sight, and I ask you how many teeth it had and you don’t know, how well did you really look it over?
Eastern Gray Squirrel skull.
Study every square inch, look in the nasal cavity, flip it over, look at all of the teeth, see how the jaw fits (if you have it). Are there any marks or damage, any broken teeth?
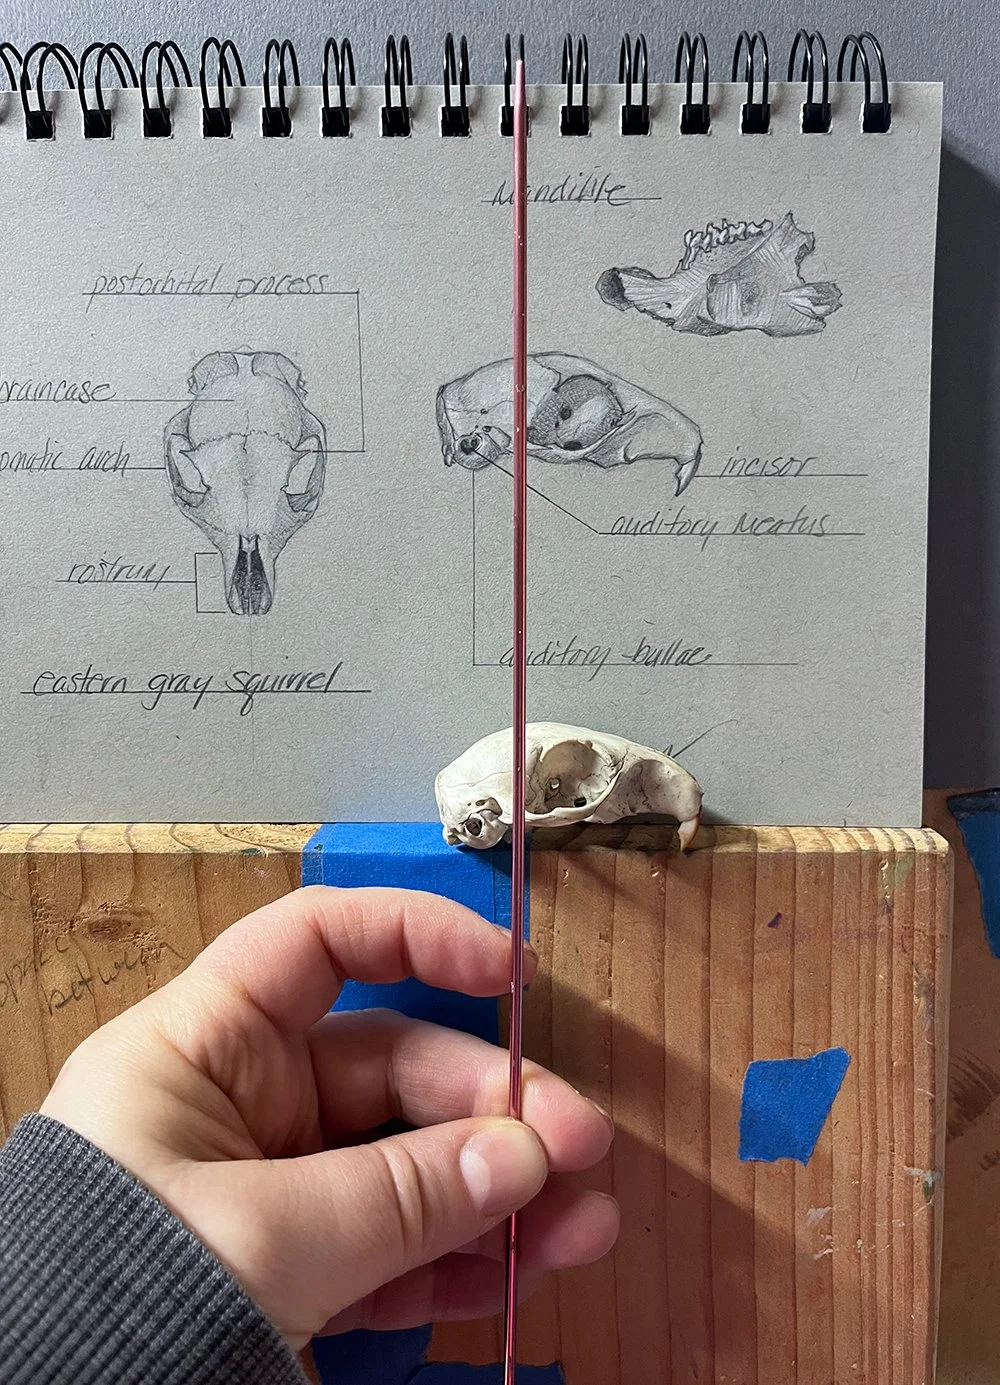
Look at it straight on, or from the top, and use something with a straight edge (like a. pencil, knitting needle, etc.) to analyze proportions. Is it symmetrical? Probably not. I’ve never drawn a skull that was perfectly symmetrical.
Create anatomical study drawings.
Anatomical study of an Eastern Gray Squirrel skull. © Christine Mercer-Vernon.
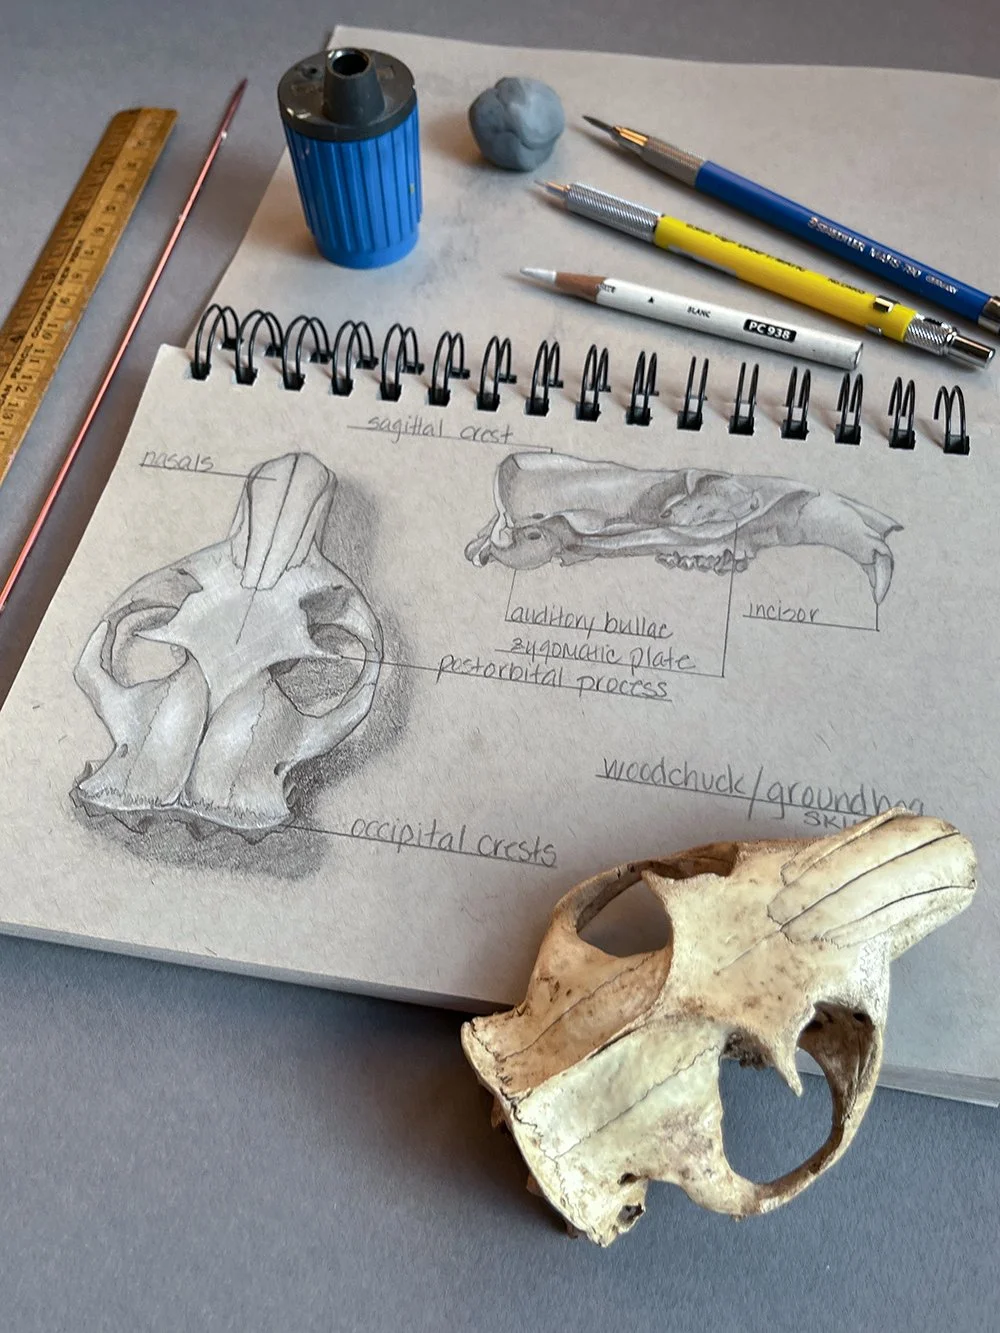
Before I attempt a finished artwork, I create anatomical drawings for study in graphite and white colored pencil.
These are sight size drawings. Meaning they are drawn actual size, with the skull and my sketchbook side by side or skull above/below (or sometimes right on my sketchbook). This allows me to use a knitting needle to compare key points in the drawing for accuracy.
I prefer to use a toned sketchbook that is dark enough to account for the midtones. This makes drawing faster as the primary focus will be on light and shadow.
Draw as many views as you want. I prefer to do at least a profile and top view. Sometimes, I’ll draw other views if needed, or just because I want to.
The key to these drawings is accuracy. This is your chance to study every detail, identify landmarks to aid in establishing proper proportions, and understand the overall structure, as well as tiny details that will be important in bringing the drawing to a finish.
If you aren’t sure of the correct anatomical names, google the skull anatomy for whatever animal skull you have.
“Animal Skulls” by Mark Elbroch * is great reference for North American animal skulls. I refer to this book constantly! It will also help you identify found skulls.
Paint an alla prima study.
Alla prima is a fancy way to describe working directly, wet-into-wet, or all at once. Usually completing an artwork in one sitting.
Creating quick studies are a great way to get more familiar with your skull. The level of finish is up to you. I like to paint a quick study of a skull that’s more than a sketch but not as finished as a final painting would be.
High key, alla prima study of a domestic cat skull. Oil on paper.
@ Christine Mercer-Vernon.
I begin with large shapes and then dial in details while focusing on proportions and ensuring that I’m locating important landmarks accurately. As detailed as the above painting may look, I’m mostly suggesting with simple brushstrokes. It’s the accurate placement of important details that makes the skull identifiable.
Playing with limited or restricted color palettes is another way to take the focus off of color accuracy and place it prominently on proportions. This way you can put your attention into nailing down those shapes and important details without the pressure of having to mix accurate color.
If you struggle with values, use one color and create a monochromatic painting. Simply mix up five to seven values (I prefer five). When you feel more confident with values you can add a second color, then progress to a limited palette (three colors - red, blue, yellow - plus white).
If you love drawing and painting skulls, then these additional efforts will be enjoyable! I love sitting down with a hot beverage and losing track of time while I work on an anatomical drawing. It’s also nice to work on something that is just for me, and not have the pressure of completing a finished, sellable, artwork.
Now grab a skull and get to work!
I hope you found this helpful. As 2025 gets rolling I’ll be filming some skull drawing/painting demos, sign up for my newsletter (please note my main body of work is florals) and info will go out later this year when they become available.
Two color alla prima study of a domestic cat skull. @ Christine Mercer-Vernon.
{*Please note this link will take you to Amazon.com. As an affiliate, I earn a small commission on qualified purchases. Like super small, takes me a year to have enough to buy a paintbrush, however, I appreciate your support. }


